This whole project started with the purchase of an adorable lion ornament from Target! I loved it so much that I wanted my own tree in my room to put it on, instead of putting it on the already crowded family tree. I imagined a homemade tree and envisioned something made of sticks. So naturally I googled "DIY tree made from sticks" and I found this one on Pinterest:
But it was only a picture. There was no instructions, so I had to figure it out myself. Luckily, I have a very handy father and creative boyfriend who helped me brainstorm. Together we came up with this!
You will need:
- sticks [the number depends on how big you want your tree to be], I got mine from our neighborhood canyon
- a metal dowel [you could also use a wooden one!]
- 2 long screws
- a drill press or handheld drill [if you have a drill press it will be much easier]
- a handheld saw
- sandpaper [optional, you could go with the rustic look with no sanding]
- a pinecone
- little tree stumps [I got mine from Home Depot when we bought our christmas tree! You know how the workers cut off the bottom of your tree? Well they don't want those old cuts, so take them and CRAFT! You know?! It's recycling!]
- ruler
- sharpie
Directions:
Step 1: Go somewhere and find sticks! Lane, Harper and I went to the canyon down the street and we were able to find lots! Make sure you get sticks thick enough to drill through.
Step 2: Then take the sticks home and cut them so that there into the lengths you want. I found that in order to make the tree look proportionate you have to have some that are the same length. We used a vice and a saw to accomplish this. BE CAREFUL. Then began to line the finished sticks up to see where you're at. At this point you can sand the sticks to make them look more polished. Lane and I decided to go with the rustic look instead.
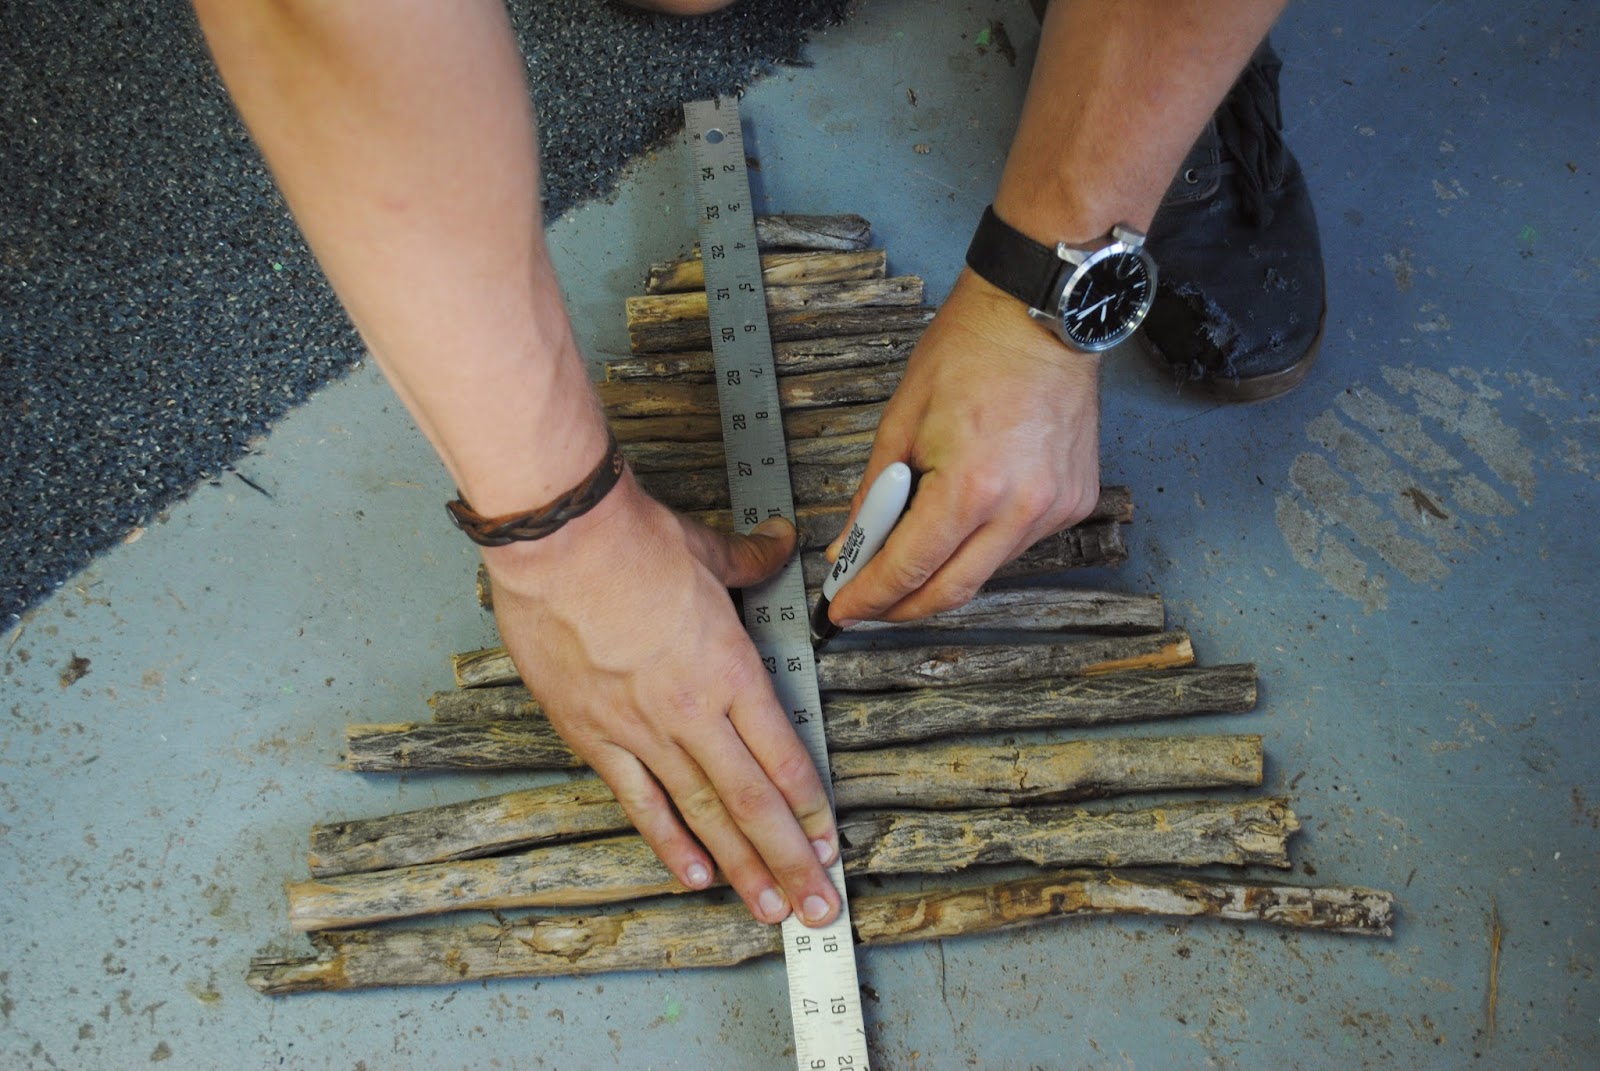
Step 3: Use a ruler and sharpie to draw a line down the center of all the sticks, so that you know where to drill the holes. Next we used a drill press [you can also you a hand held drill if that's all you have] to drill holes in each stick. Make sure that you chose a drill bit that will allow you to tightly fit the dowel through the hole. As you drill them go ahead and put them on the dowel. [I forgot to photograph this part, but you also want to find the center of the tree stumps and drill a hole in each one with the same drill bit]
Step 4: Hold the tree stumps [we used 4, but that is completely up to you] together and use a handheld drill to drill all the way through all of them. Then screw a long screw through all of the stumps. Try not to screw all the way through so that the ends come out of the top, but if it accidentally happens its not a big deal because you won't really be able to see it!
Step 5: Using the same drill bit CAREFULLY drill into a pinecone. I say carefully because it was a little scary holding the pinecone while a drill bit was spinning super fast right next to my hand. Maybe have your dad do it! Haha. Anyways, be sure to drill far enough so that the pinecone takes up the rest of the dowel. Then put that pinecone on!


TAAAAAAAAA-DAAAAAAAAA! Now for the ornaments!
These are the ones I chose:
This is an old one that we've hung on our family tree for years. I think it's cute though, so I stole it for my tree, shhhhhh! It kinda looks like it's from Holland or something!
This cute one is from Target!
Remember I talked about a lion ornament from Target? Well here he is! This guy, this guy right here is the inspiration for the whole project.
Another ornament from the family tree that has been in our family for years. But once again I loved it so I "stole" it!!
Another Target one.
Lastly, another Target find!
And the best part? It "folds" up like this so that you can store it at the end of the season! SCORE.
That's it! My first DIY post. I love this project because I think know this tree will be in my life for a very long time. Lane and I will definitely be taking it with us one day when we get married and move in together [exciting!!]! I love this project because it's something anyone can do. There's so many ways to do it and some many things you can change to make it fit you. Finally, I love this project because of what it represents. I went to get a Christmas tree with my dad where I got the stumps, went to the canyon with Lane and Harper to get the sticks, and then Lane and I worked together to make it!
Go craft with your family, friends, boyfriends, girlfriends, or puppies! It's so fun!!


No comments:
Post a Comment